54. How to configure auto backup in Desktop Sleek Bill?
Here are the steps to activate the auto backup feature in Sleek Bill:
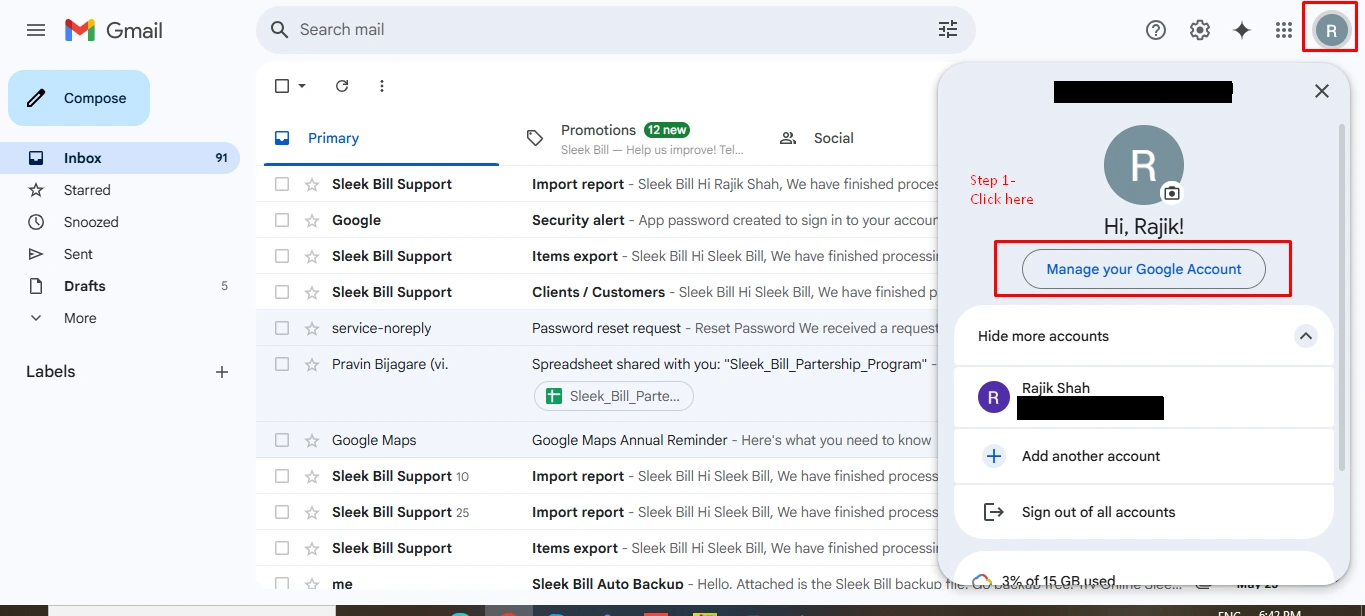
Step 1 - Once you will login on gmail account click on "manage your google account".
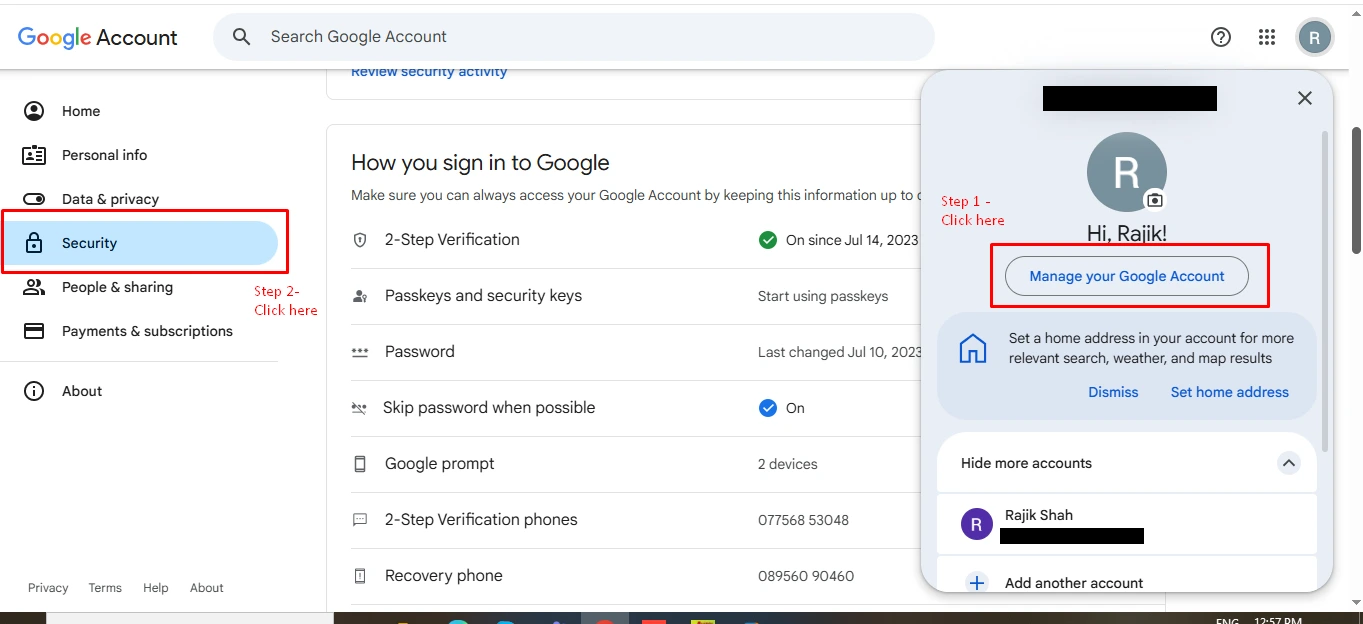
Step 2- Then click on "Security" on left hand navigation. Refer Google Chrome & Other browsers screenshot given below
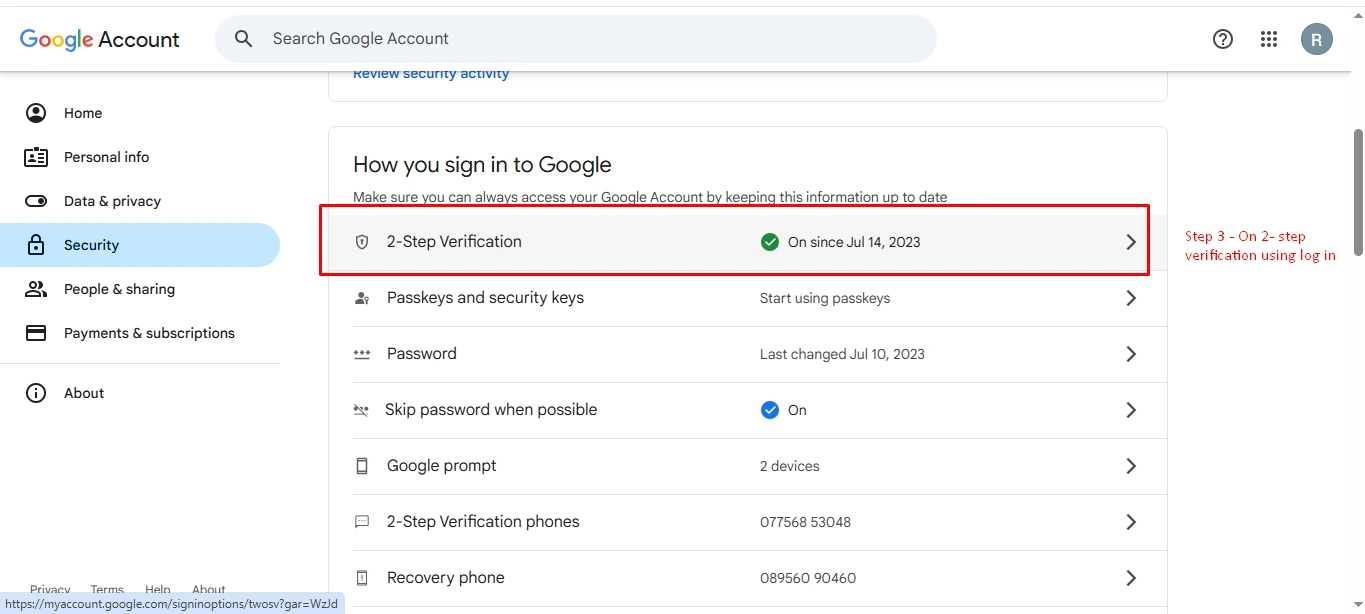
Step 3- Click on 2 step verification using login.
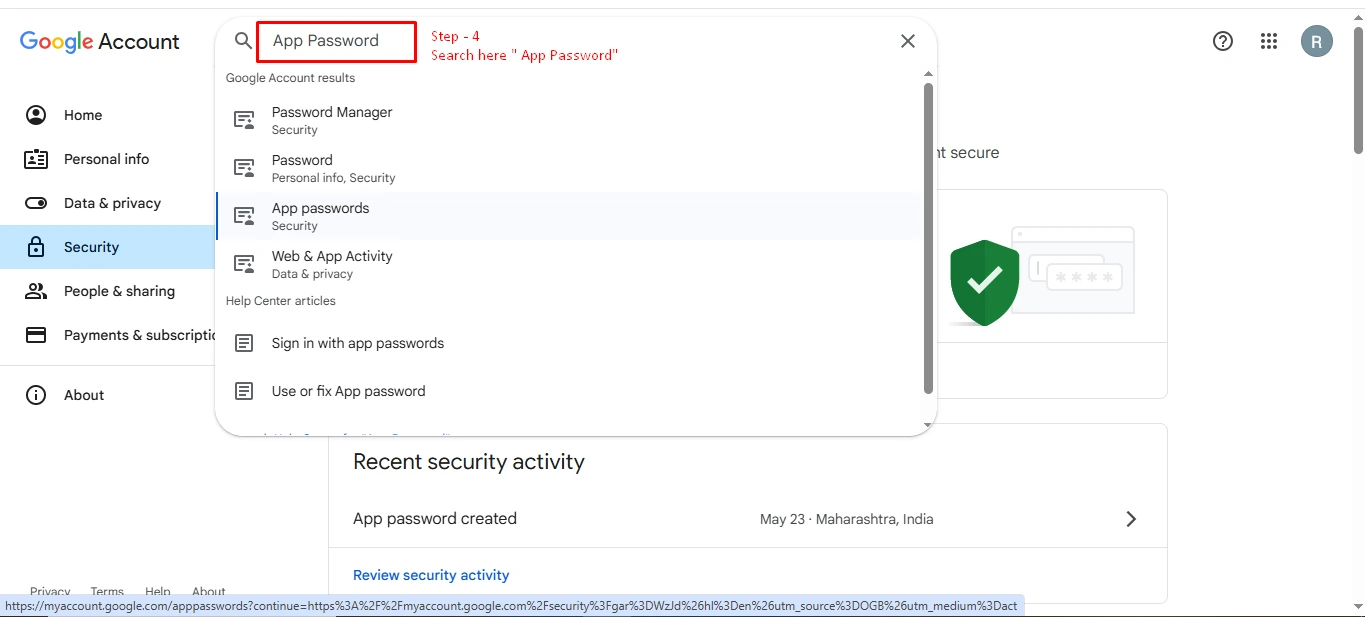
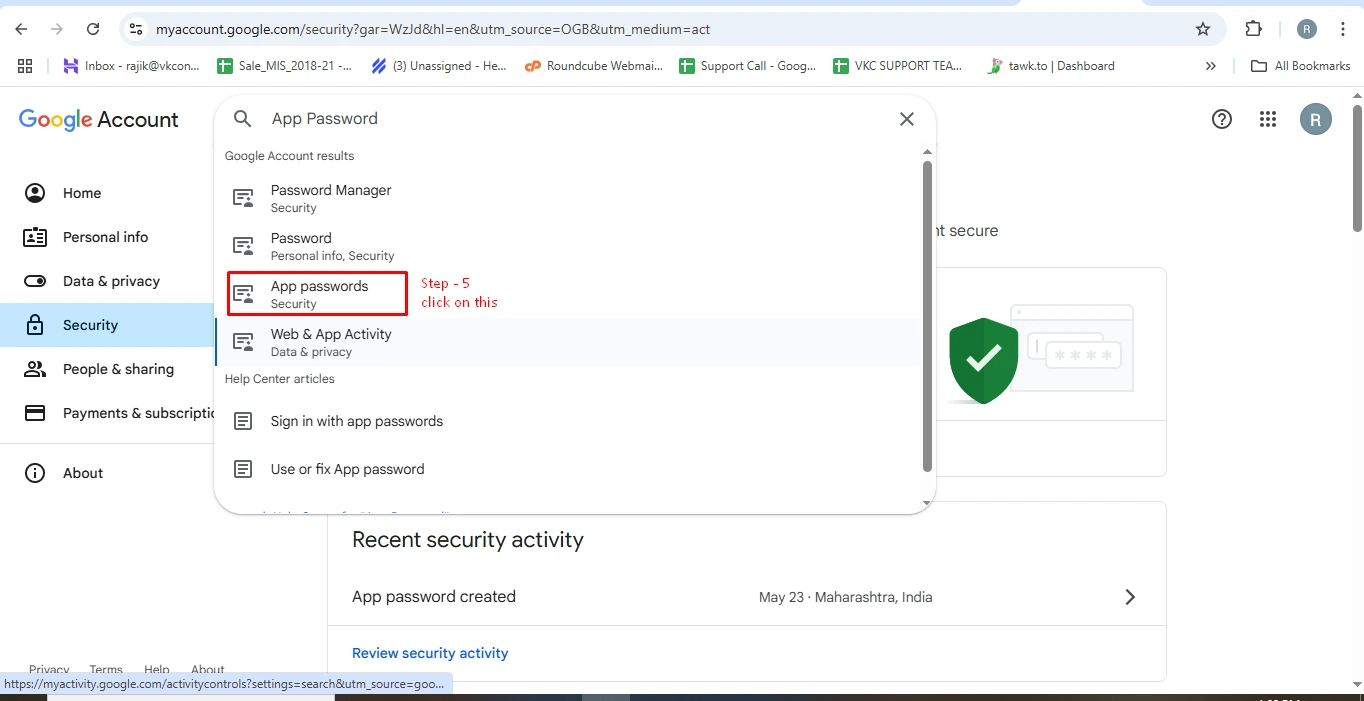
Step 4- Then search "app passwords" on search bar.
Step 5- Select on "app passwords" and click on app password.
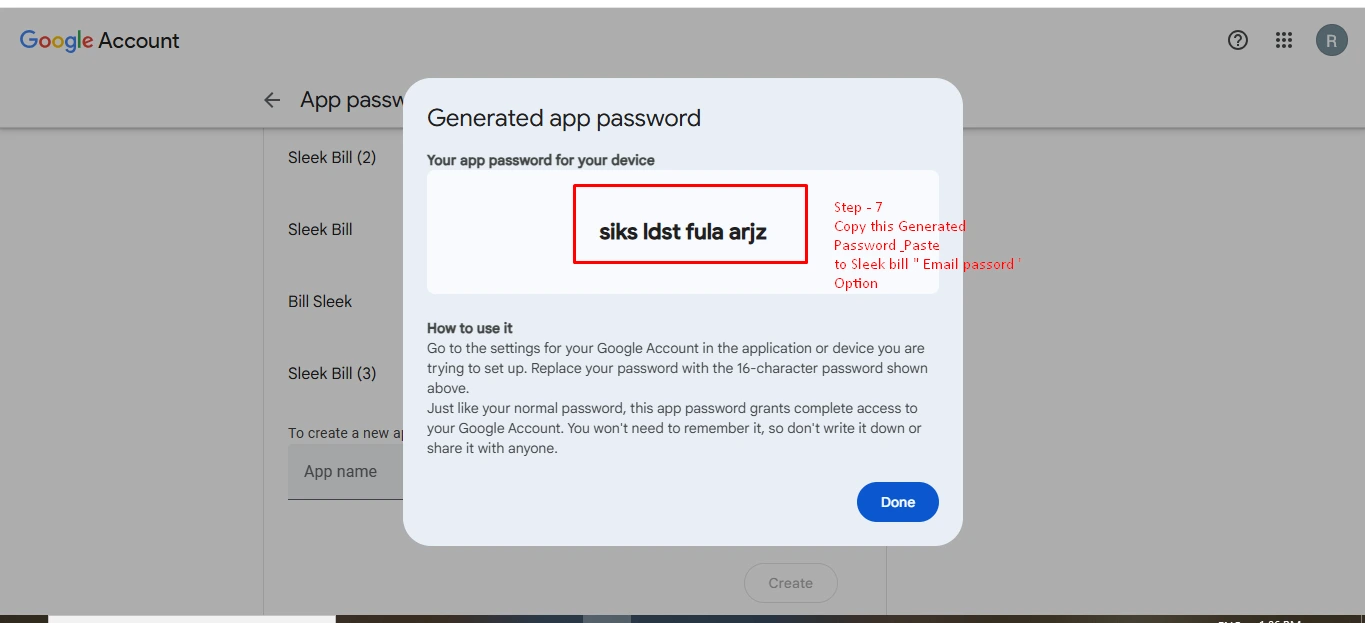
Step 6- Enter the app name "Sleek Bill" and then click on "create" at bottom.

Step 7- Then generates your password. Copy this generated password and paste to Sleek Bill "Gmail password" Option.
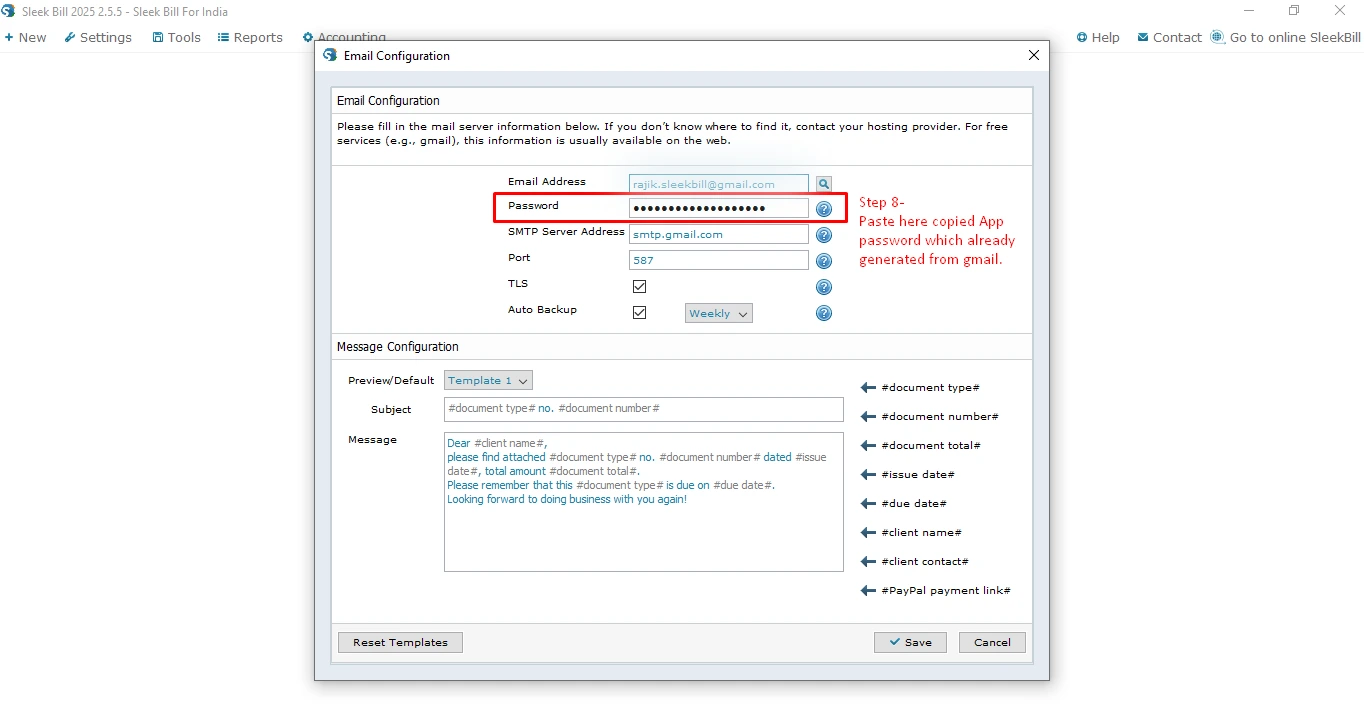
Step 8- Paste in password field were copied app password which already generated form Gmail.
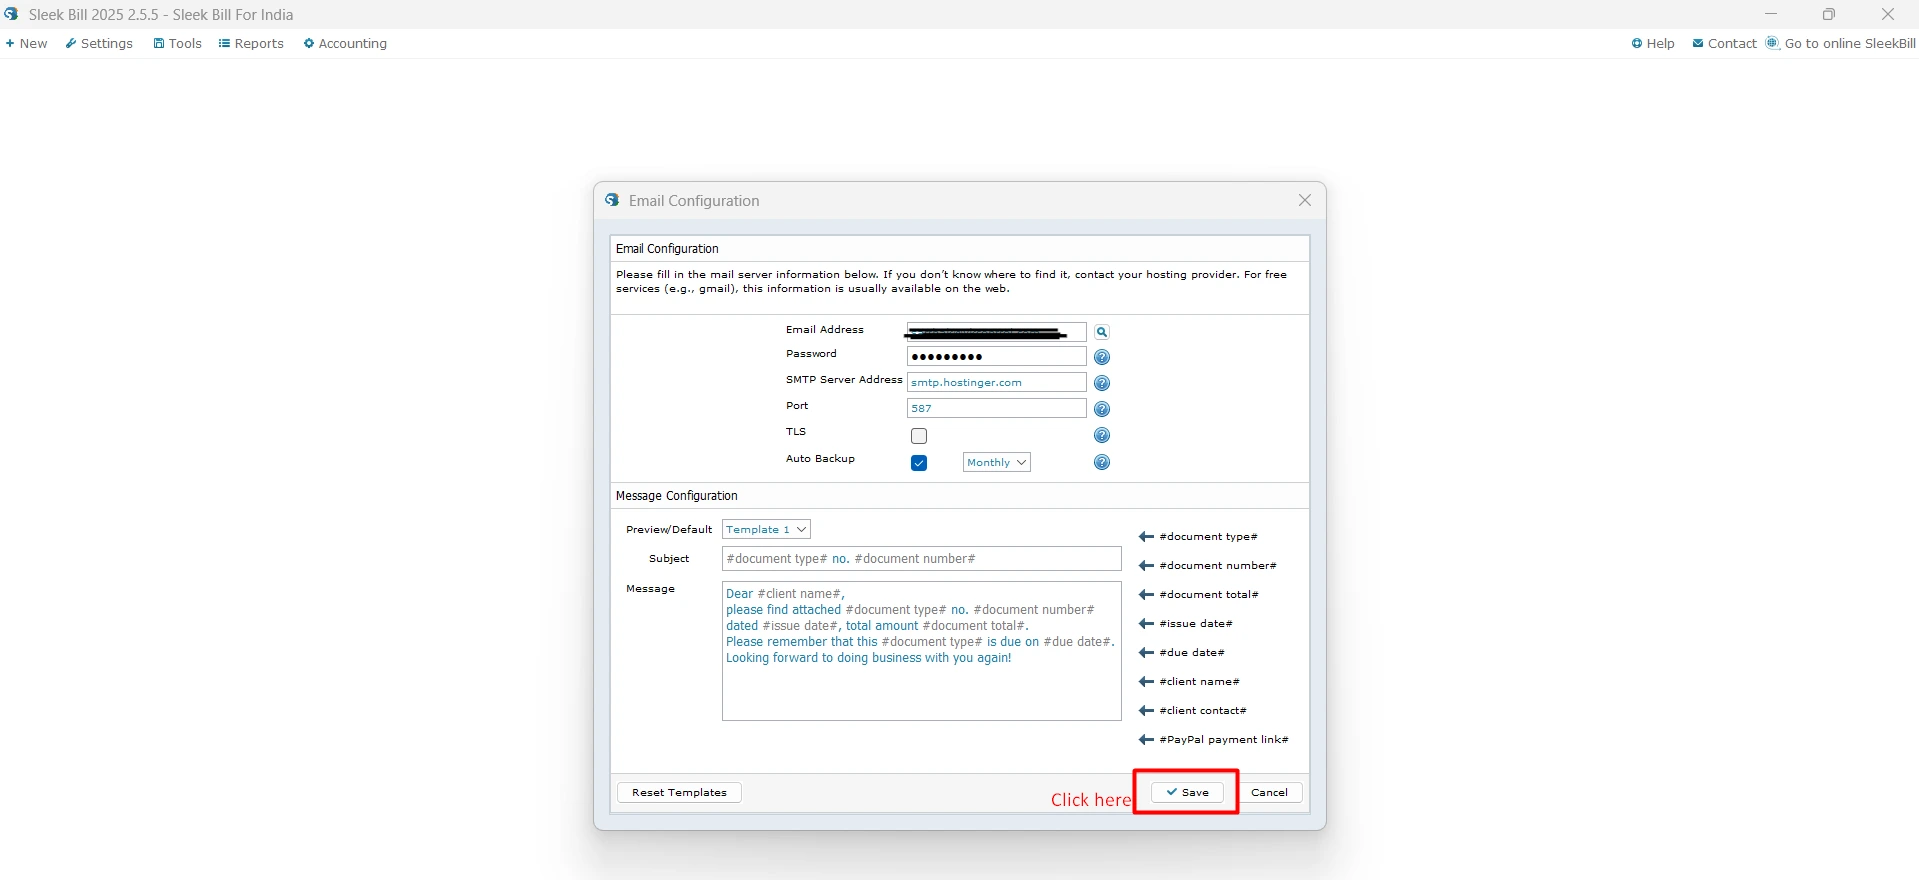
Step 9- After entering Gmail address then select "Auto Backup" option and select yearly, monthly, daily for auto backup data in software.
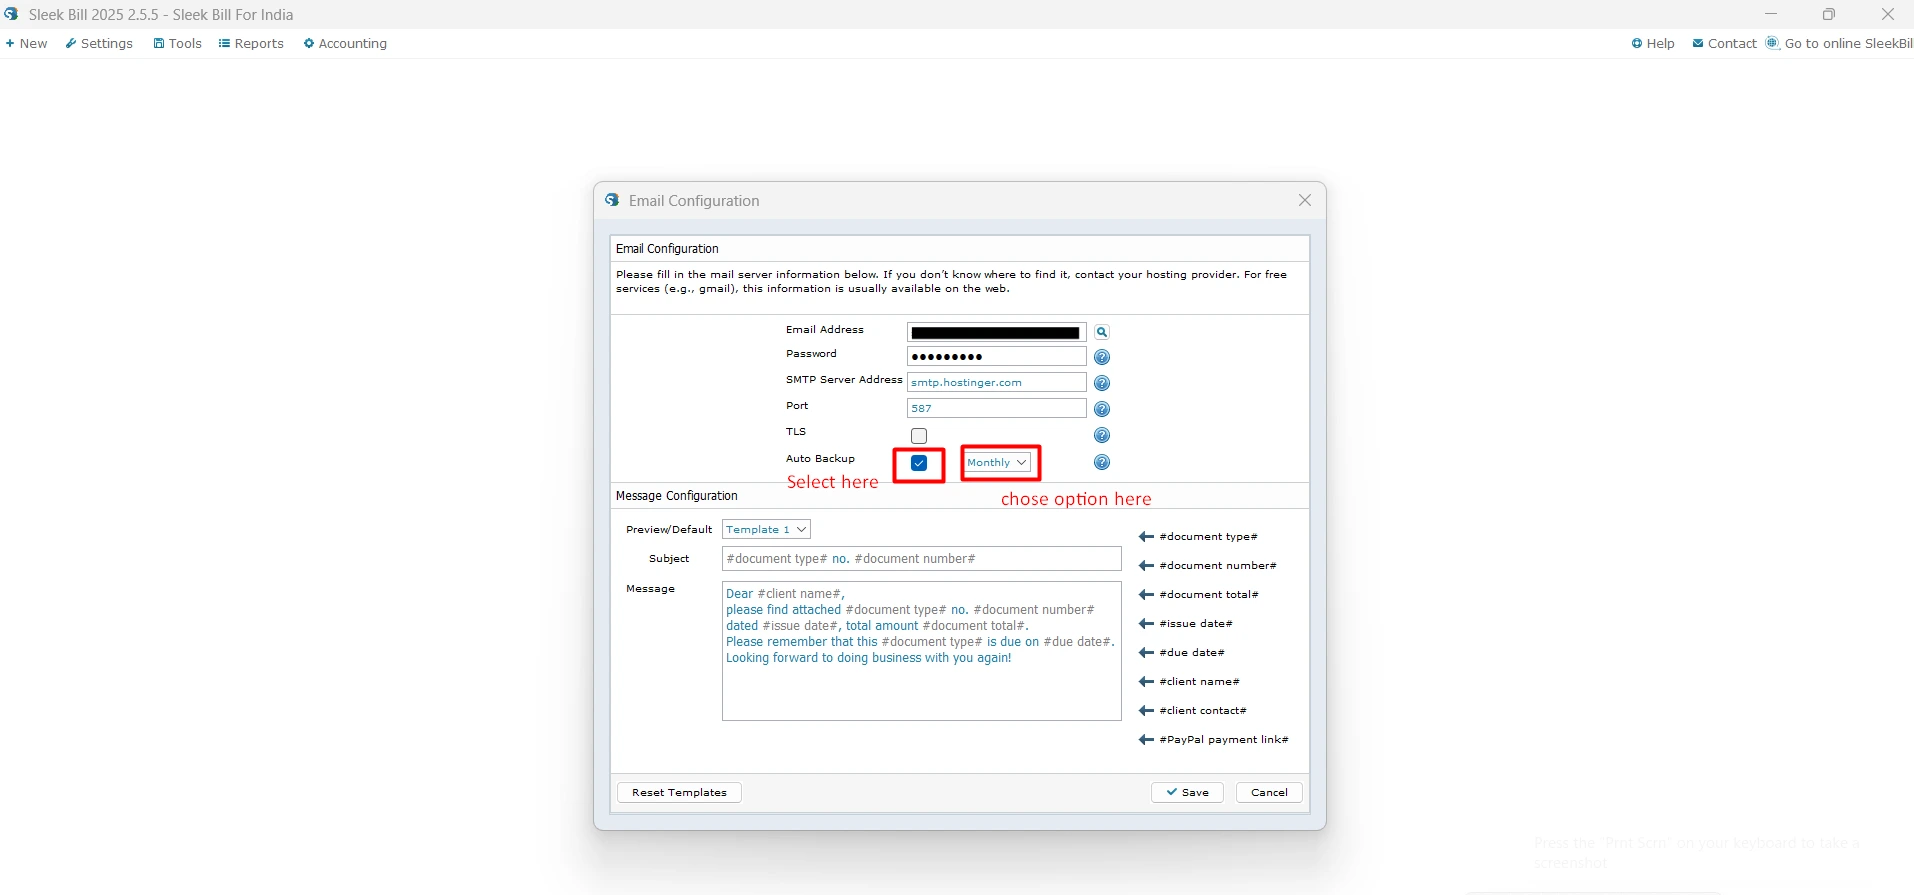
Step 10- Then click on "save" button at bottom of software.
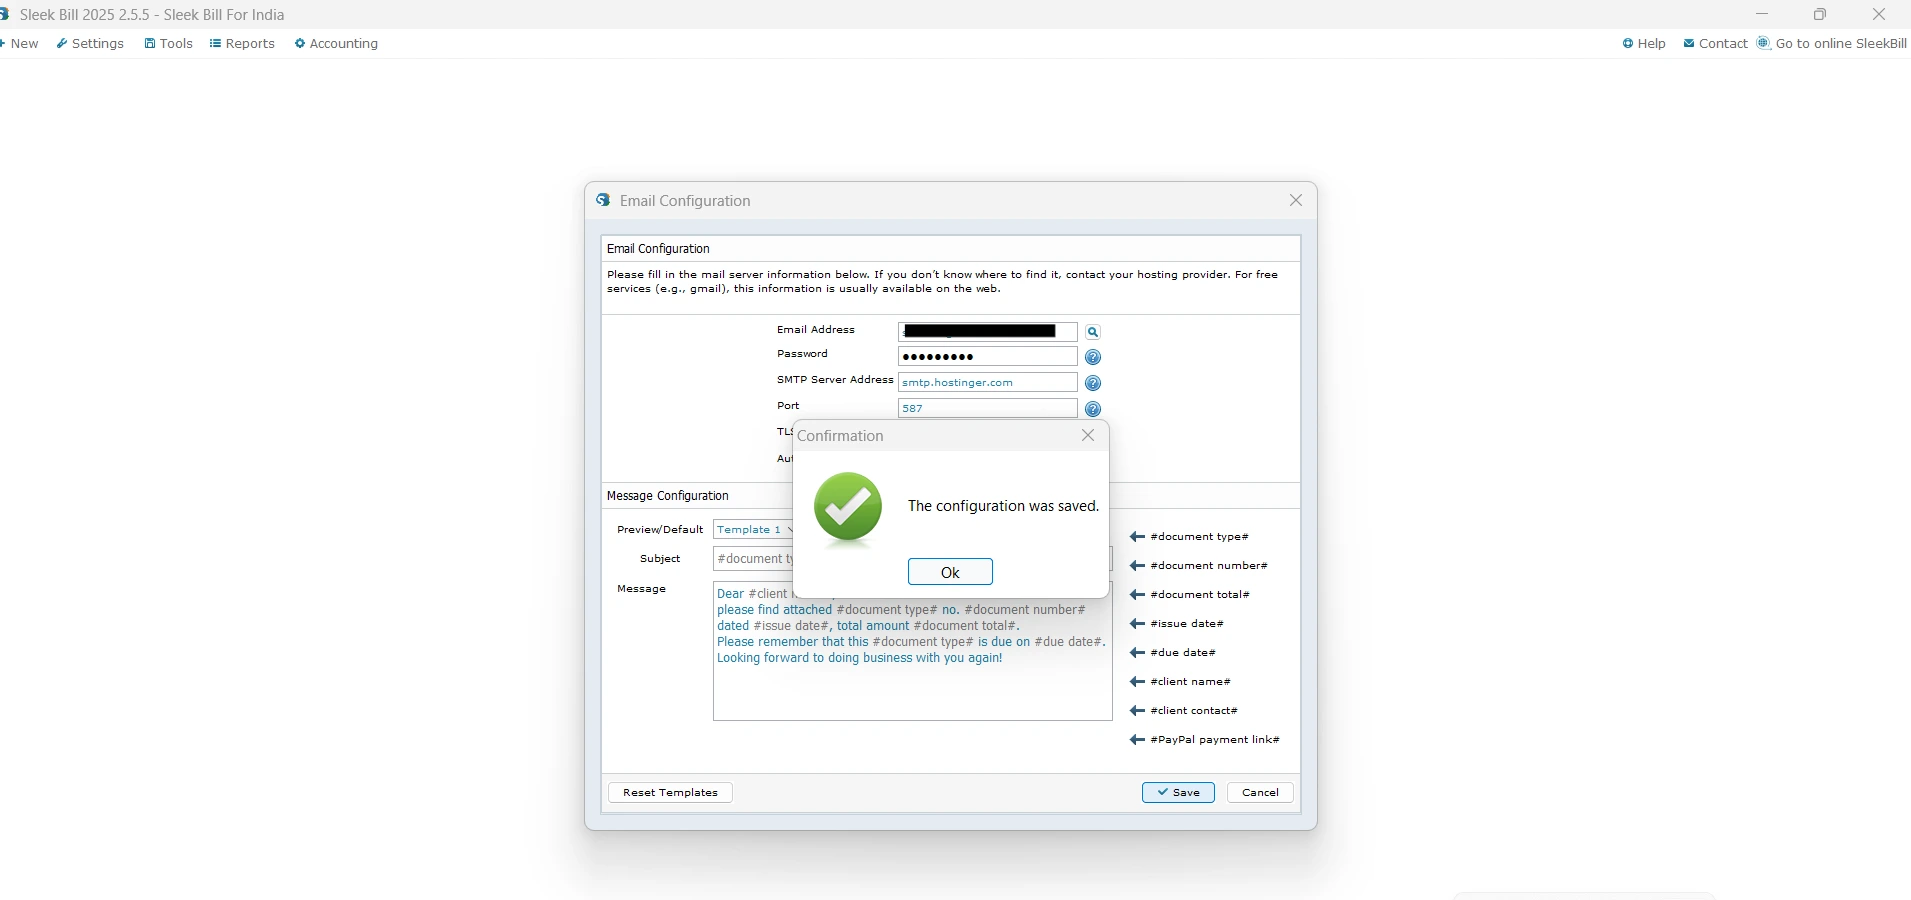
Step 11- Popup window is appears "configiration was saved ". Now auto backup is active.
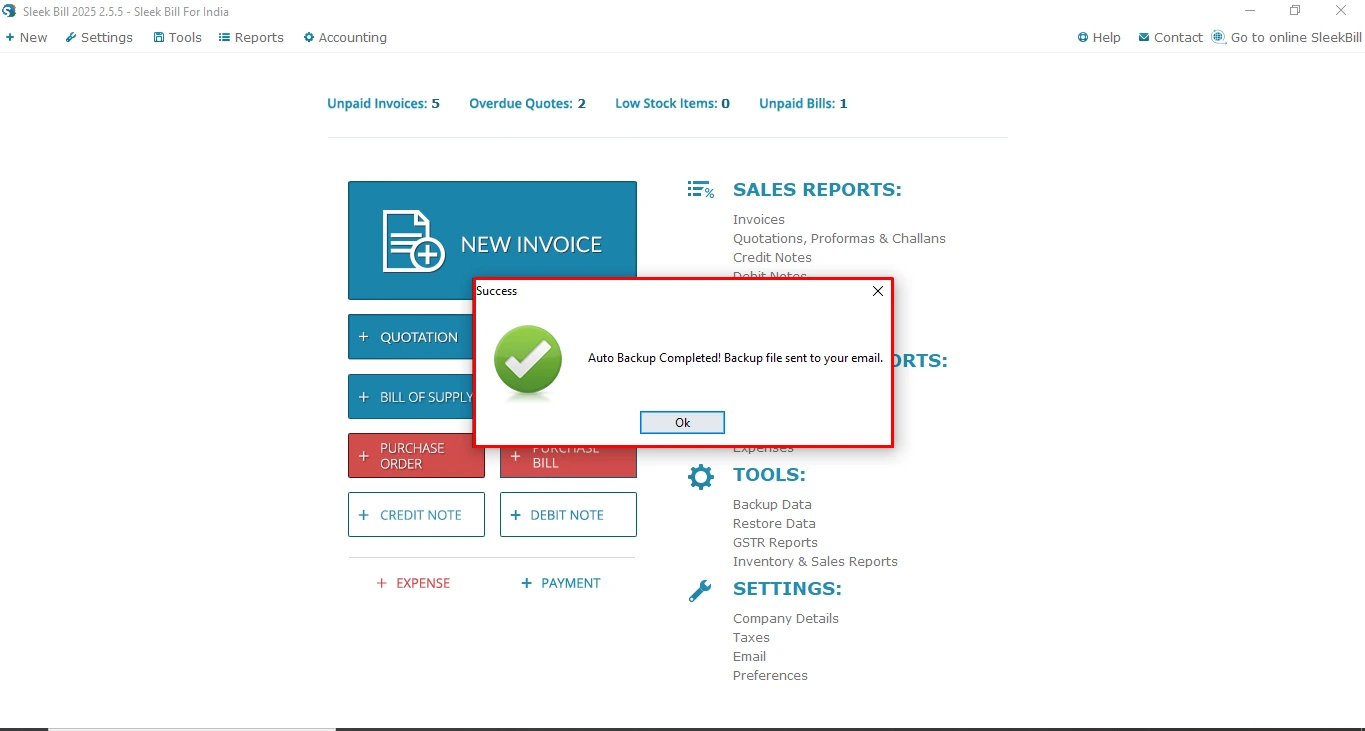
Step 12- Wait for processing for auto backup on schedule, do not try to close.

Finally auto backup process complete & check your email Inbox
For Further Assistance
If you have any query or need help feel free to contact our support team:
📞 Sales & Support
+91-8956090455 /56 /57 /58
📧 Email : support@billingsoftware.in
< Back to Questions
 I was looking for a simple and effective invoice/billing software. I tried quite a few options before reaching Sleek Bill (India). I really like the easy to understand interface and all the reporting and customization features it offers. Sleek Bill for India is a great choice for me and I truly recommend it.